To use nail drill bits safely, I recommend these 10 steps: select the right bit for your task, fully charge your device, set speed below 5,000 RPM initially, properly prep nails with acetone cleaning, hold the drill like a pen at a 45-degree angle, use continuous back-and-forth motions, wear safety goggles in a well-ventilated area, clean bits after each use, sanitize with chemical disinfection or heat sterilization, and store bits in dedicated organizers away from sunlight. These fundamentals establish the foundation for effective technique.
Key Takeaways
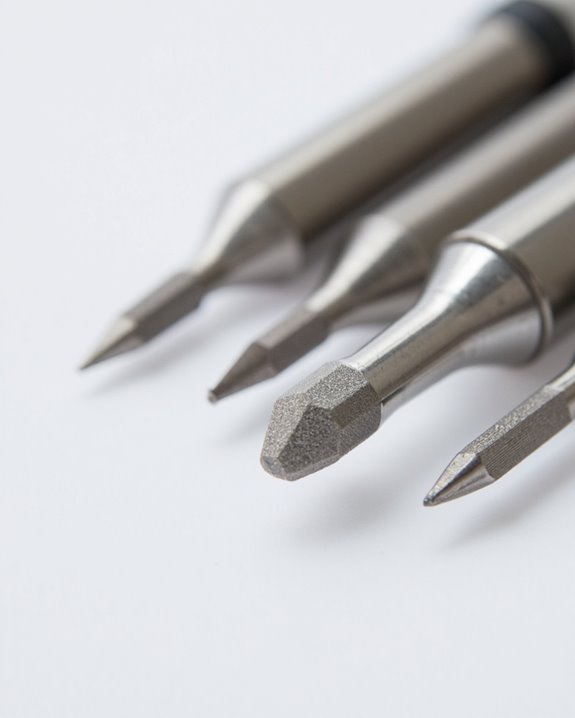
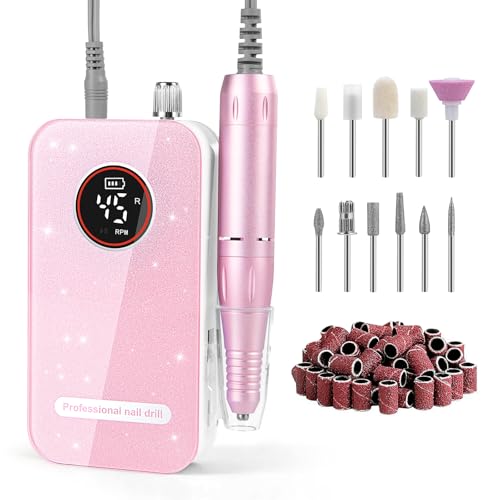
- Choose the right bit shape for your task – tapered barrel for cuticle work, large barrel for overall shaping.
- Always start below 5,000 RPM for beginners and maintain a 45-degree angle to the nail.
- Hold the drill like a pen with thumb and index finger for stability while keeping your wrist straight.
- Use continuous back-and-forth motions to prevent heat buildup that could damage natural nails.
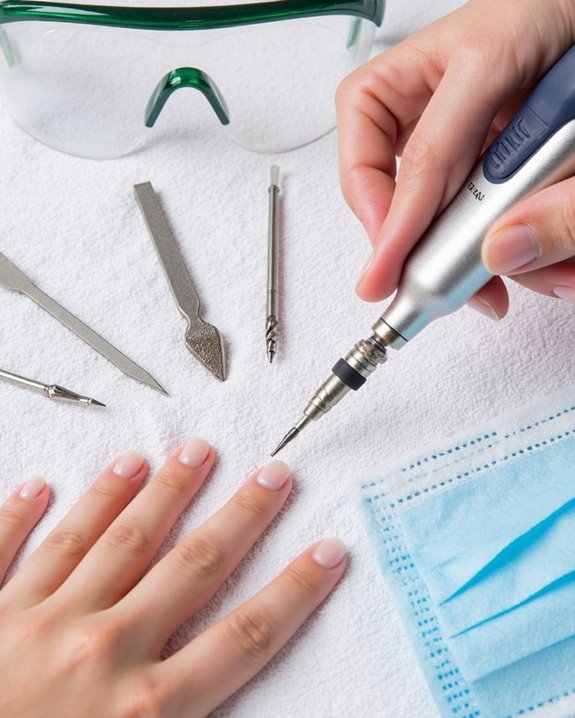
- Always wear safety goggles and work in a well-ventilated area to protect against nail dust.
Selecting the Right Nail Drill Bits for Your Project
The foundation of safe nail drill usage begins with selecting appropriate bits for your specific needs. I always recommend choosing bits with a standard 3/32-inch shank size, as this guarantees compatibility with most professional electric nail files while preventing equipment malfunctions that can lead to nail damage.
When selecting Nail Drill Bits, I match the grit level precisely to my task—coarse grits for quick acrylic removal, fine grits for gentle natural nail smoothing. For long-term value, I invest in high-quality Carbide Bit options, which remove product more evenly and can be sterilized between uses, unlike disposable sanding bands. The bit’s shape matters greatly; I select tapered barrel bits with shallow flute cuts for precise cuticle work, while large barrel bits work efficiently for overall nail shaping.

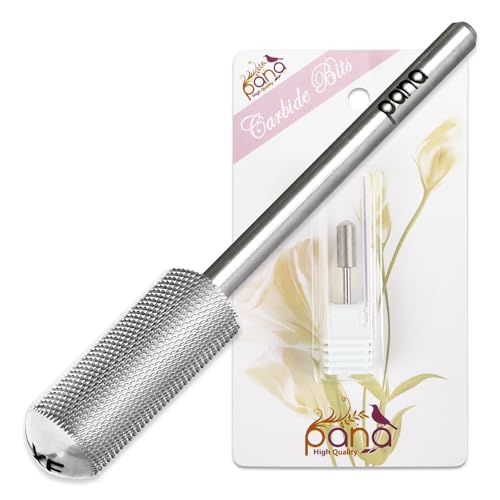
Small Crystal Top Barrel Shaped Mandrel Bit: MelodySusie 3.1mm mandrel bit are designed with a premium metal material, which is stable and easy to insert into the bit and maintain stability.

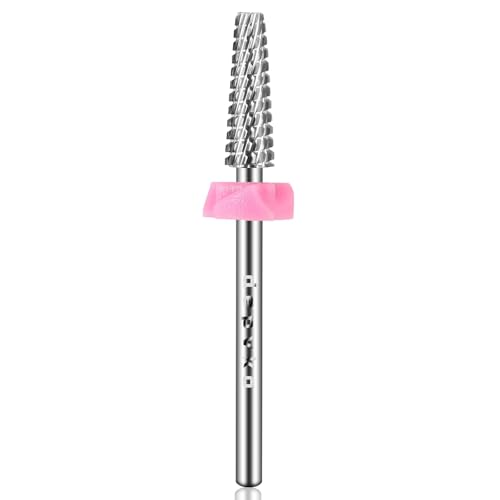
5 in 1 Cross Cut Carbide Nail Drill Bits | Color: Purple | Grit: Fine | Shank Size: 3/32'' | Two-Way Rotation.

【Quality Material】Made of good-quality tungsten steel, this cuticle remover drill bit provides salon-level precision to remove dead skin with ease. 3XF ultra-fine grit ensures effective exfoliation to prevent damage to the nail bed. Its low-vibration design minimizes hand fatigue, making it suitable for long-duration cuticle removal. The purple dust ring effectively blocks debris to extend service life.
Proper Charging and Setup of Your Nail Drill
Before using your nail drill, why should you prioritize proper charging? A fully charged battery guarantees your drill won’t suddenly lose power during detailed work, especially when using a coarse nail drill bit on tougher materials. I always charge my cordless drill completely before each session, following the manufacturers instructions regarding specific charging duration to prevent potential battery damage.
When setting up, I first confirm the drill is powered off and all bits are removed before connecting the charger. This safety precaution prevents accidental activation and potential injuries. I check the battery indicator to verify full power, then store the charging equipment in a cool, dry location as specified by the manufacturer. This careful preparation guarantees my nail drill performs reliably throughout the entire procedure, whether I’m working on acrylics or natural nails.

【Pretty and Useful】Our nail supplies organizer is designed with feminine style instead of neutral style,as well as broidery technics,makes the bag more pretty and stylish.Also,we designed 2 side pockets for things like polish remover that can leak if stored in bag,makes the bag more practical.

Power Cord for Nail Drill Machine, Nail Drill Charger 110V

High-Speed Performance: The 45,000 RPM motor offers smooth, efficient performance with minimal noise and vibration.The nail drill is powerful enough for quick polishing and acrylic nail removal, yet gentle on natural nails. Perfect for both beginners and professionals.
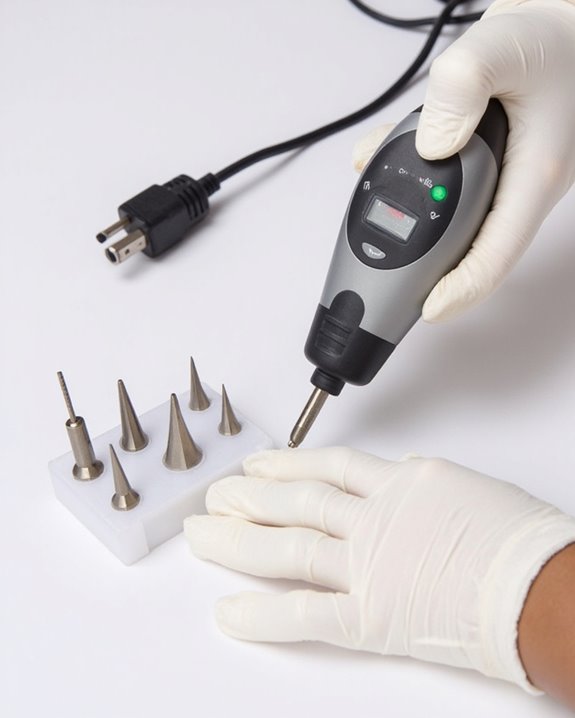
Setting Appropriate Speed and Direction Controls
Three important settings require your attention before powering on your nail drill: speed level, rotation direction, and comfort control. I always recommend starting below 5,000 RPM to get accustomed to the vibration and maintain better control. When performing nail shaping, never exceed 10,000 RPM, as higher speeds can generate excessive heat without damaging the natural nail bed. Additionally, using the correct adjustable speed settings ensures precision and safety during your nail care routine. As you gain confidence, you’ll gradually increase your speed, but safety should remain your priority. For direction control, most nail work requires clockwise rotation, but always check your manufacturer’s guidelines for specific recommendations. I suggest testing your selected speed and direction on a practice surface first, allowing you to confirm smooth operation before applying the drill to actual nails. This preparation step greatly reduces the risk of accidental damage.

12-in-1 Nail Drill Kit: Breosic electric nail drill kit includes 12 multi-functional drill bits for manicures, hand and pedicures care. This nail drill is ideal for filing, polishing, shaping, and removing gel nails, acrylic nails, thick nails, nail polish, synthetic nails, natural nails, nail extensions and cuticles

【PROFESSIONAL 45000 RPM MOTOR】Elevate your manicure game with our electric nail drill featuring a robust upgraded aluminum alloy motor. Reaching speeds up to 45000 RPM with minimal vibration, this nail drill professional tool ensures smooth, efficient filing. Whether you are a beginner or a seasoned tech, it is an essential addition to your nail supplies tools for flawless results.
✔️【45,000 RPM Professional Nail Drill】Achieve salon-quality results with this upgraded nail drill, powered by a high-performance 45,000 RPM aluminum alloy motor. The advanced ventilation system and precision bearing design ensure stable operation while reducing heat, vibration, and noise (<40dB). The specially designed glittery accents elevate its aesthetic appeal with an eye-catching sparkle. Perfect for polishing, shaping, and removing gel nails at home or in salons
Preparing Natural Nails Before Using a Drill
Since proper preparation creates the foundation for successful nail enhancements, I’ll guide you through establishing an ideal starting surface for your nail drill. Begin by removing old polish with pure acetone, then wash your hands thoroughly with antibacterial soap to eliminate bacteria. Next, trim your nails to your desired length and carefully remove any hangnails with clean tools. For optimal results, ensure your natural nails are free from oils and residues by using a cleaning and prep process. Apply a light layer of cuticle oil to hydrate the nail bed, allowing it to absorb for a minute before wiping with rubbing alcohol to guarantee a clean surface. Select a fine-grit sanding band for your drill to gently buff the nail surface without causing damage to the natural nail. This careful preparation prevents excessive abrasion while creating the perfect texture for product adhesion.
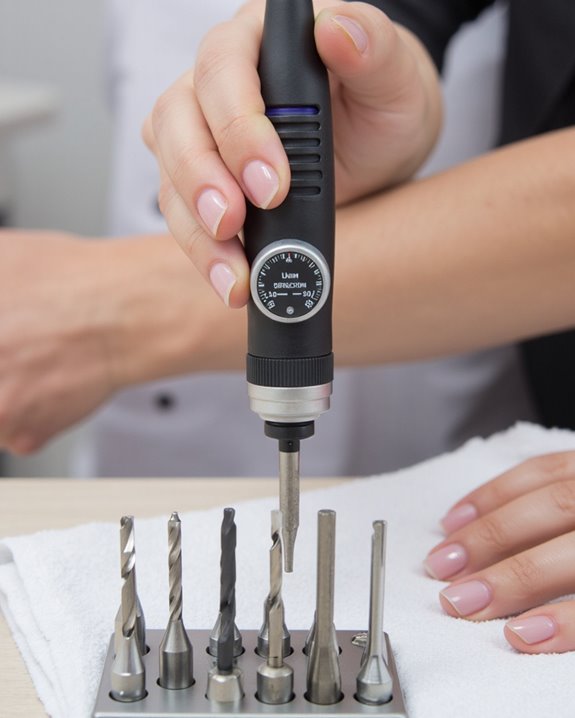
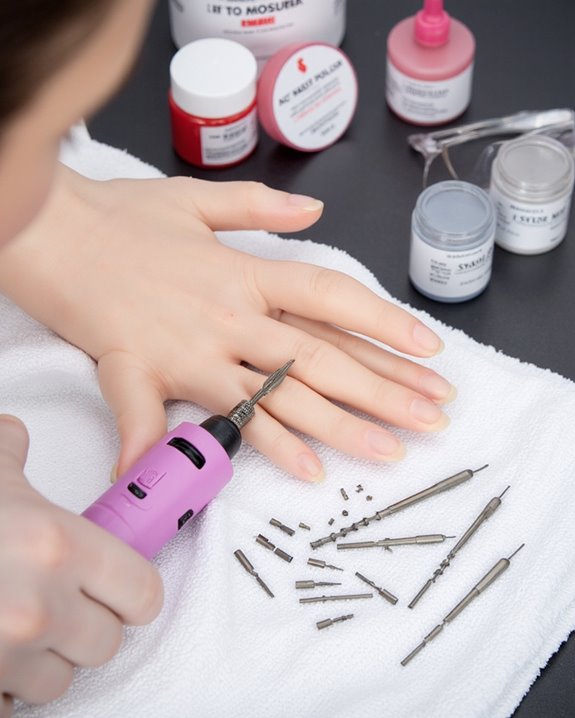
Mastering the Correct Holding Technique
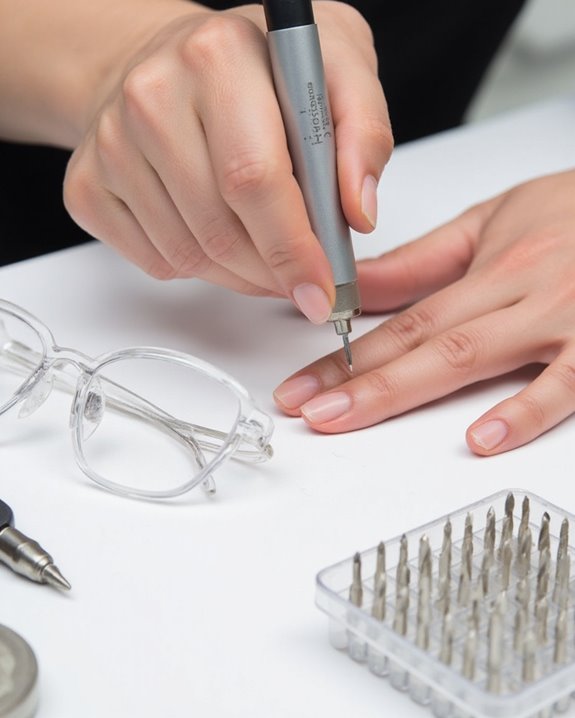
How you grip your nail drill directly impacts your precision, safety, and the quality of your manicure results. I recommend holding your drill like a pen, with your thumb and index finger positioned around the handle while your remaining fingers support the base. This provides stability while preventing accidental slips that could damage your nail bed.
Maintain a straight wrist aligned with your arm to reduce fatigue and improve accuracy. Position the drill at a 45-degree angle to the nail surface, which creates ideal bit contact while preventing heat buildup. Before working on actual nails, I suggest practicing on a stationary surface first, starting below 5,000 RPM for beginners. As your confidence grows, you can gradually increase to 10,000 RPM for natural nails, always applying minimal pressure for safe, effective results.
Moving the Bit Properly to Prevent Heat Buildup
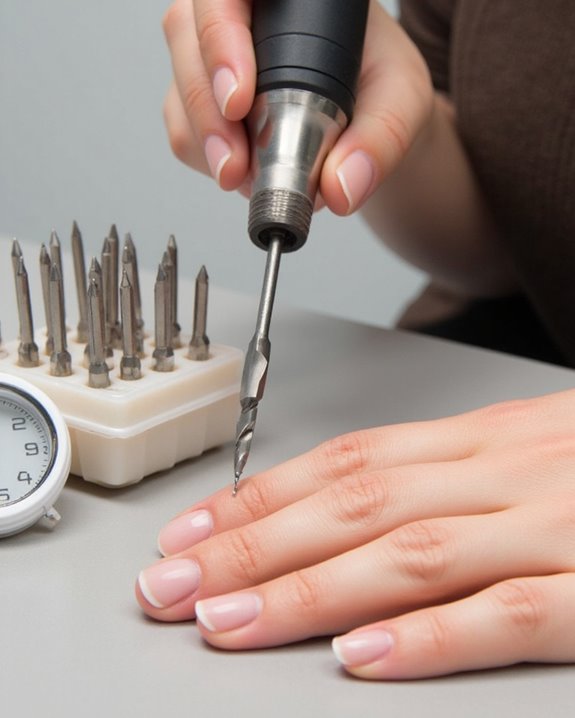
The proper movement of your nail drill bit represents one of the most critical safety techniques you’ll need to master. When working on gel nails or acrylic nails, I always maintain a continuous back-and-forth motion across the nail surface, never keeping the bit stationary in one spot. This distributes friction evenly, preventing the uncomfortable heat buildup that can damage your natural nail beneath. Additionally, using adjustable speed settings helps control the heat generated during filing. I recommend starting with speeds under 5,000 RPM, which gives you better control while generating less heat. Apply only minimal pressure as you move the bit—let the tool do the work instead of pressing down. If you notice any warmth developing, adjust your technique immediately. Combining these movement practices with fine-grit bits creates the safest filing experience, especially important when working on thinner natural nails.
Specialized Techniques for Gel and Acrylic Nails
Moving from proper bit movement, let’s shift our focus to specific approaches required for different nail enhancement materials. When removing Gel Polish, I always recommend using a coarse-grit bit with gentle pressure to prevent excessive heat that could damage the natural nail underneath. For thinning gel layers, select a medium-grit sanding band and apply minimal pressure to protect the nail’s structural integrity.
Acrylic nails require different handling altogether. I use gold or silver carbide bits for these applications, as they’re durable and won’t wear down quickly during product removal. Always match your bit’s grit level to the specific acrylic task, using finer grits for finishing work around edges. Remember to clean and sterilize your carbide bits immediately after each use to maintain proper hygiene and prevent bacterial contamination between clients.
All-in-one Versatile Nail Drill Bits: Crafted for professional results: Edge refining, gel removal, C-curve shaping, and hard callus grinding. Perfect for detailed nail art and maintenance with one nail bits for nail drill.

🎀 【PRODUCT DETAILS】: 5 in 1 Nail Drill Bit | 3/32" Shank Size | Color: Silver | Grit: Fine - F | Two-Way Rotation | Dimensions: 1.6" Length
✨ 【PRODUCT DETAILS】: Small Barrel 3/32" Shank Size | Color: Silver | Grit: Extra Fine - XF | Two-Way Rotation | Dimensions: 1.5" Length | For Safety, do not use if dropped
Safety Measures to Protect Your Eyes and Lungs
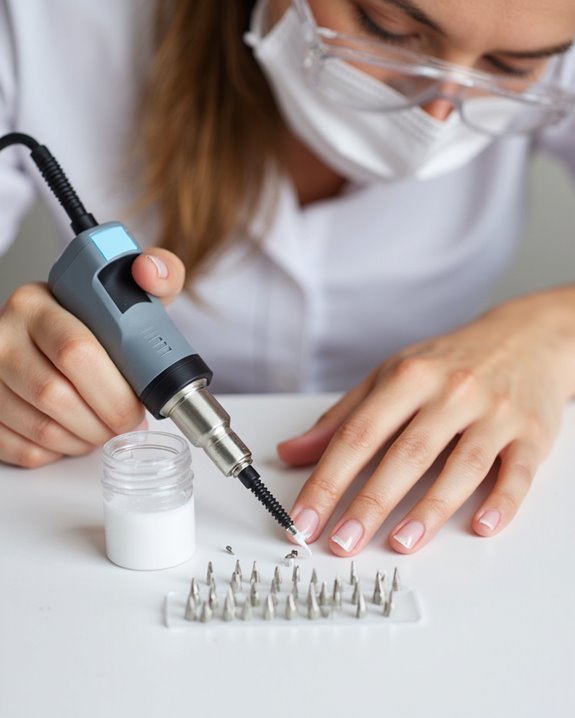
When performing nail services with electric files, protecting your eyes and lungs should be your absolute priority, as tiny dust particles can cause significant health problems over time. I always recommend wearing safety goggles to shield your eyes from flying debris that can cause irritation or damage. You need to know that operating your drill below 5,000 RPM greatly reduces dust production, protecting your respiratory system from harmful particles.
Always work in a well-ventilated area and allow dust to air dry before cleaning to prevent it from becoming airborne again. Apply minimal pressure while continuously moving the bit to prevent heat buildup and excessive dust generation. Take regular breaks in dust-free environments during long sessions, especially when you notice increased particle production that could potentially compromise your lung health.
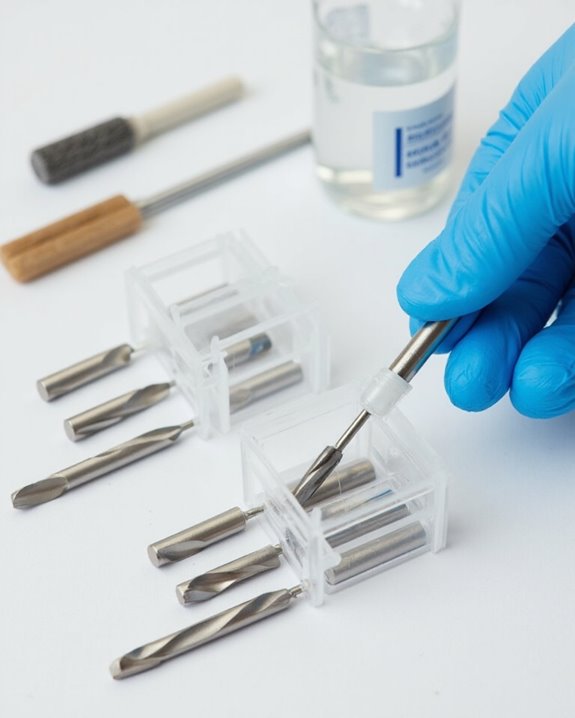
Cleaning and Sanitizing Your Bits After Use
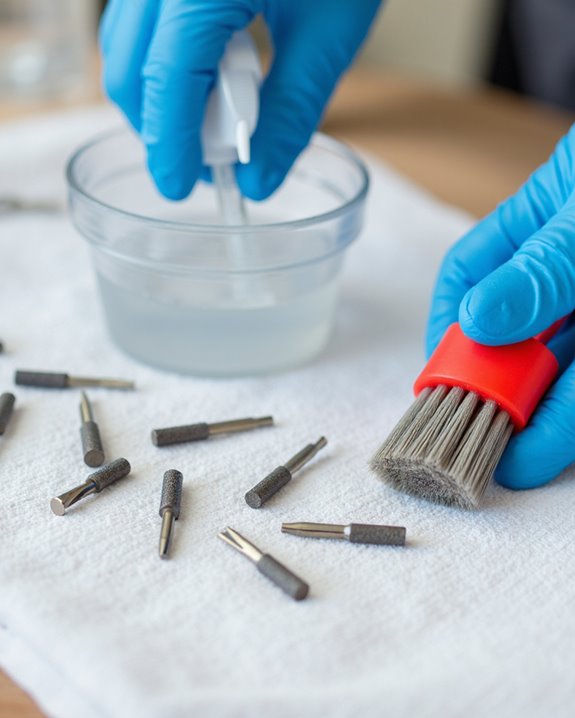
Proper cleaning and sanitizing of your nail drill bits isn’t just recommended—it’s essential for maintaining both your equipment’s longevity and your clients’ safety. As a first step, I always remove any visible debris from my bits immediately after each client session, focusing particularly on the carbide and ceramic bits that can be reused.
You’ll need to choose between two recommended sanitization methods: either chemical disinfection with an appropriate solution or heat sterilization. Remember, sanding bands can’t withstand these cleaning processes and shouldn’t be reused. I make this cleaning routine non-negotiable after every single client to prevent bacteria buildup and cross-contamination. This consistent practice not only extends the life of my expensive bits but also guarantees I’m providing safe, professional services that meet industry hygiene standards.
Storing Your Nail Drill Equipment Properly
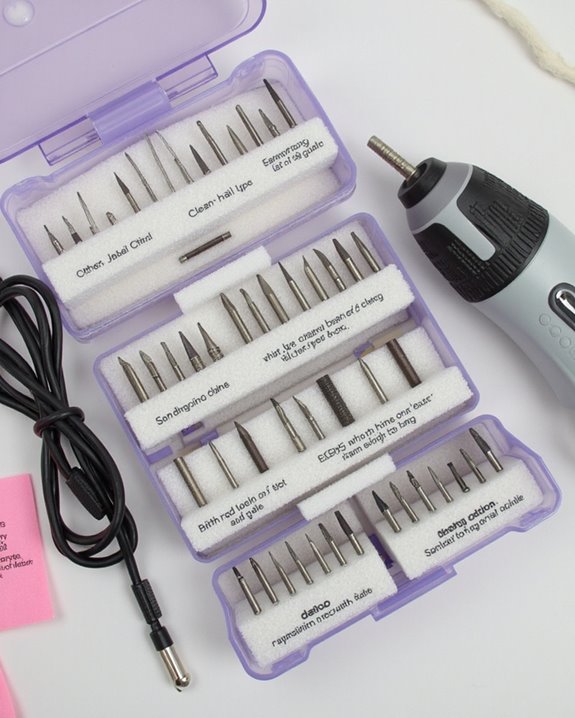
After giving your nail drill bits a thorough cleaning, the storage process becomes just as essential for maintaining their quality and effectiveness. I recommend using dedicated organizers that separate different shapes of bits to prevent them from colliding and dulling their edges. In the beauty industry, professionals know that keeping bits in a dry, cool area away from sunlight extends their lifespan greatly.
I always store my carbide and ceramic bits in protective cases with individual slots, preventing moisture damage while keeping each type easily identifiable. When organizing your equipment, create a system where sanding bands remain separate from metal bits to avoid cross-contamination. Before returning to storage, I inspect each bit for signs of wear, ensuring I’m not preserving damaged tools that might compromise future nail services.
Frequently Asked Questions
How to Use Nail Drill Bits for Beginners?
I’d recommend starting with beginner safety in mind—wear eye protection and practice on fake tips first. Keep speed adjustment low, under 5,000 RPM, until you’re comfortable with the vibration and control.
What Are the Different Tips for on a Nail Drill?
I’ve found various tips for nail drills including barrel, pointed, cuticle cleaner, cone, and tapered barrel bits. Always check tip compatibility with your drill and practice bit sterilization between clients for safety.
What Do the Different Colors on Nail Drill Bits Mean?
I’m absolutely stunned by how color codes reveal everything about nail drill bits! Gold and silver typically indicate carbide bit materials—durable and heat-resistant options. Different colors help you quickly identify the right bit for your task.
How to Use a Nail Shaping Tool?
When I use a nail shaping tool, I always maintain a light grip technique—like holding a pencil—and follow safety measures by starting on low speed, keeping the bit moving constantly to prevent heat buildup.