To remove acrylic nails without tools, start by soaking your fingertips in warm, soapy water for 10 minutes to soften the adhesive. Next, apply jojoba oil around the nail edges and gently wiggle each acrylic side-to-side until it loosens. If resistance occurs, repeat the soaking process. After removal, thoroughly rinse your nails and apply moisturizer to repair damage. Allow your natural nails 7-10 days to recover before applying any polish. The proper technique prevents up to 50% of potential nail damage.
Key Takeaways
- Soak fingertips in warm, soapy water for at least 10 minutes to soften the acrylic adhesive.
- Apply jojoba oil around nail edges and let sit for 10-15 minutes to break down the adhesive bond.
- Gently wiggle acrylic nails side to side until they detach, returning to soak if resistance is encountered.
- Thoroughly rinse natural nails with warm water and remove all adhesive residue.
- Allow nails to recover for 7-10 days while applying moisturizer twice daily to restore strength and flexibility.
Gather Your Basic Supplies For Safe Removal
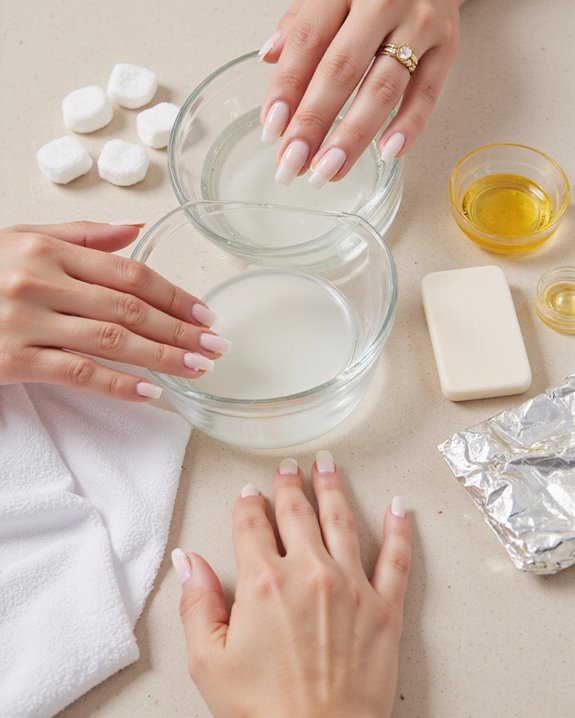
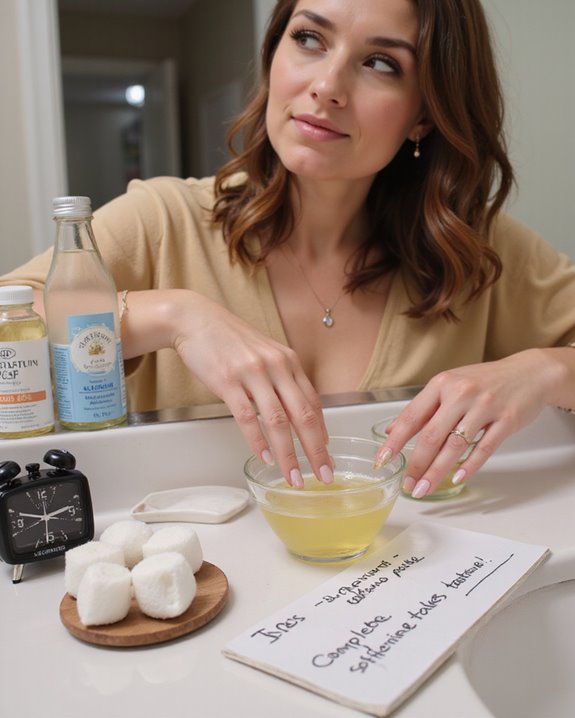
While you might think you need professional tools to remove acrylic nails, I’ve found that common household items work just as effectively when properly used. Start by selecting a non-acetone nail polish remover, which offers gentler yet efficient adhesive dissolution compared to its acetone counterparts. For budget choices, prepare a bowl of hot water with mild, fragrance-free soap—an economical alternative that softens acrylic bonds in about 10 minutes. Using a gentle formula minimizes damage to your natural nails. Include cotton balls or pads for controlled application of your remover, minimizing mess and waste. I also recommend investing in natural jojoba-based cuticle oil, a versatile supply alternative that protects your natural nails throughout the removal process. These accessible, inexpensive items provide everything needed for safe removal without specialized equipment, making the process both affordable and effective.
Soak Your Nails In Warm Soapy Water
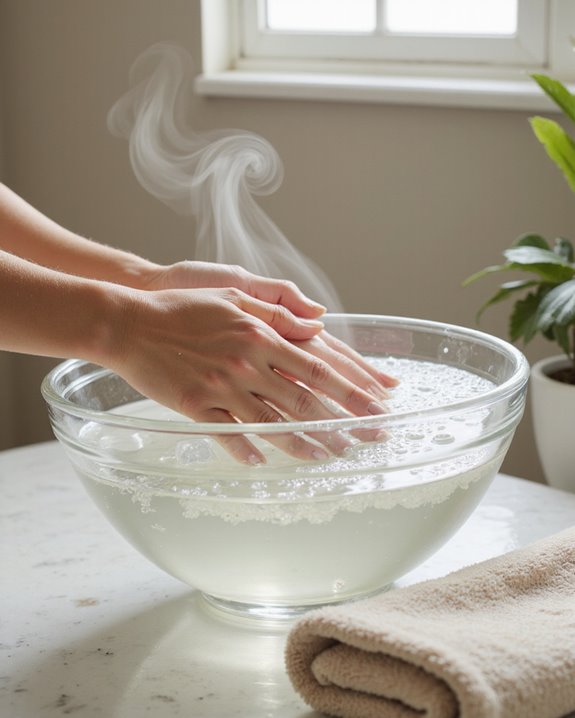
Fill a medium-sized bowl with comfortably warm water, then add a tablespoon of mild, fragrance-free soap to create your soaking solution. The Water Quality is vital here—it should be hot enough to soften the adhesive but not scalding, as excessive heat can damage your skin and natural nails underneath. Using a high-quality formula can help ensure the acrylics soften effectively and reduce potential damage. Submerge your fingertips completely and allow your nails to soak for at least 10 minutes, which provides several Soaking Benefits including gentle adhesive breakdown and cuticle hydration. I’ve found this method effectively loosens the bond between the acrylic and your natural nail without harsh chemicals. While soaking, you’ll notice the edges of your acrylics beginning to lift slightly, indicating the process is working. After the full soaking time, test one nail by applying gentle pressure to see if the adhesive has sufficiently softened.
Gently Loosen The Edges With Your Fingers
Begin working on the acrylic nail removal by carefully testing the edges after your soaking session. Using the proper Finger Technique, position your fingertips at one corner of the acrylic nail and apply gentle, steady pressure to slightly lift the edge. I recommend working methodically, focusing on one nail at a time to maintain control and prevent accidental damage to your natural nail bed.
If you feel resistance, don’t force it — this is essential for Edge Safety. Simply return the nail to the warm, soapy water for another few minutes before trying again. Your movements should be slow and deliberate, paying close attention to how your nail responds. You’ll know you’re on the right track when you feel a slight give without pain or discomfort. Remember, patience during this step prevents splitting or breaking your natural nails.
Additionally, using proper removal techniques can help minimize damage and make the process smoother.
Apply Natural Oils To Soften The Adhesive
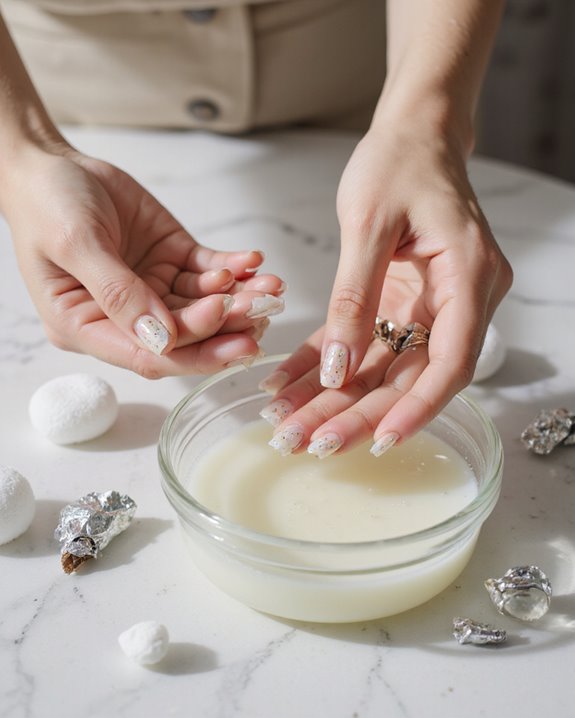
Once you’ve gently tested the edges of your acrylic nails, it’s time to introduce some natural oils into your removal process. I recommend using jojoba oil as your primary carrier oil, which closely mimics your skin’s natural sebum and effectively penetrates the adhesive bond. Apply 2-3 drops of this oil, or alternatively almond oil, around each acrylic nail using your fingertips or a cotton swab, ensuring complete coverage where the natural nail meets the acrylic.
Allow the oil to work for 10-15 minutes, giving it sufficient time to break down the adhesive structure. Essential oils like lavender can be added to carrier oils for their soothing properties, but they’re optional for this procedure. This method can reduce nail damage by approximately 50% compared to mechanical removal techniques, making it worth the extra time investment.
Allow Extra Time For Complete Softening
While you might be impatient to remove those acrylic nails immediately, patience truly pays off during this critical softening phase. I recommend soaking your nails for at least 10 minutes in hot, soapy water, but don’t hesitate to extend this time to 15 minutes for best results. The Extension Benefits are significant—giving adhesives extra time to fully soften prevents damage to your natural nails and makes the removal process virtually effortless.
Consider the Patience Risks of rushing this step: incomplete softening forces you to apply unnecessary pressure, potentially causing nail trauma or breakage. If you notice resistance after the initial soak, simply continue soaking for additional minutes. The water temperature directly affects softening efficiency, so maintain warmth throughout the process. Remember, those extra minutes of patience protect weeks of nail health.
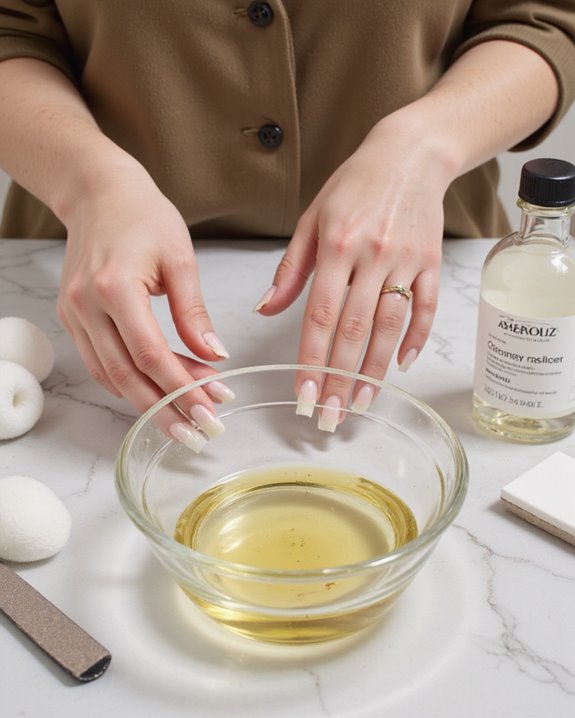
Carefully Wiggle Off Each Nail
Now that the adhesive has properly softened, the gentle removal phase can begin. I’ll guide you through the precise technique that preserves your natural nails’ integrity while ensuring complete acrylic removal.
Take one nail at a time and grasp its edge firmly but without excessive pressure. Using proper Motion Direction, wiggle the nail side to side with a deliberate back-and-forth motion starting from the cuticle area. Maintain consistent Speed Control, moving slowly to prevent painful tearing or damage to your nail bed. I recommend continuing this gentle manipulation until you feel the acrylic loosening from your natural nail.
Don’t rush to pull it off completely until you’re certain it’s fully detached, as premature removal can cause splitting. When the nail begins lifting easily, continue the side-to-side motion until it slides off smoothly.
Repeat The Soaking Process If Needed
If your acrylic nails don’t budge after the initial soaking session, you’ll need to repeat the process to further dissolve the adhesive. I recommend doing another 10-minute soak in hot, soapy water, checking after each session to see if the nails have loosened enough for gentle removal. This repeat frequency may vary depending on how strongly your acrylics are attached, but don’t rush the process.
While soaking multiple times, I always prioritize skin monitoring to avoid irritation or damage. Check your cuticles and surrounding skin between soaks for signs of redness or sensitivity. This gentle, repetitive approach might take longer than acetone-based methods, but it greatly reduces the risk of damaging your natural nails. Patience is key—continuing with the soaking technique until the acrylics lift easily is worth the extra time.
Rinse Your Natural Nails Thoroughly
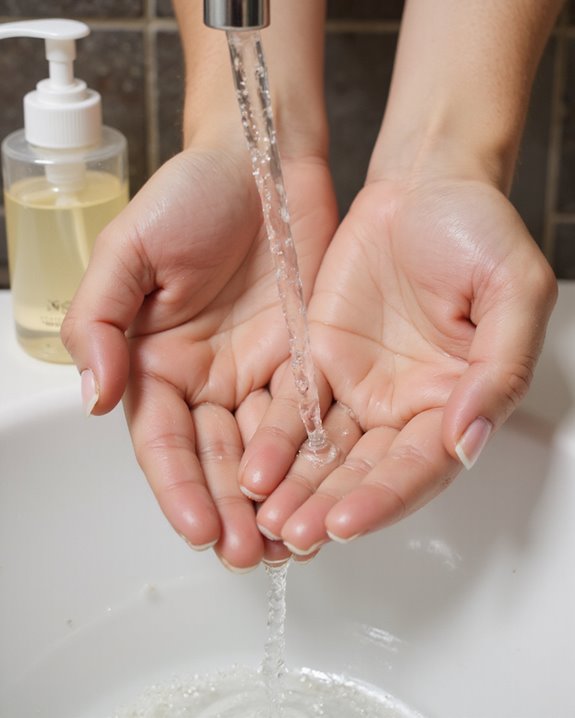
Once you’ve successfully loosened your acrylic nails through the soaking process, it’s essential to rinse your natural nails thoroughly with warm, soapy water. I recommend using a mild, fragrance-free soap to minimize potential irritation while ensuring all adhesive residue is completely removed from your nail beds.
For ideal hygiene tips, place your fingertips under running water for at least 60 seconds, gently rubbing each nail to dislodge any remaining debris. If you’re looking for rinse alternatives, a solution of lukewarm water with a teaspoon of gentle shampoo works effectively when running water isn’t available. This thorough rinsing step is non-negotiable in your removal routine, as it prevents chemical residue from causing potential allergic reactions and creates a clean foundation for your natural nails to recover.
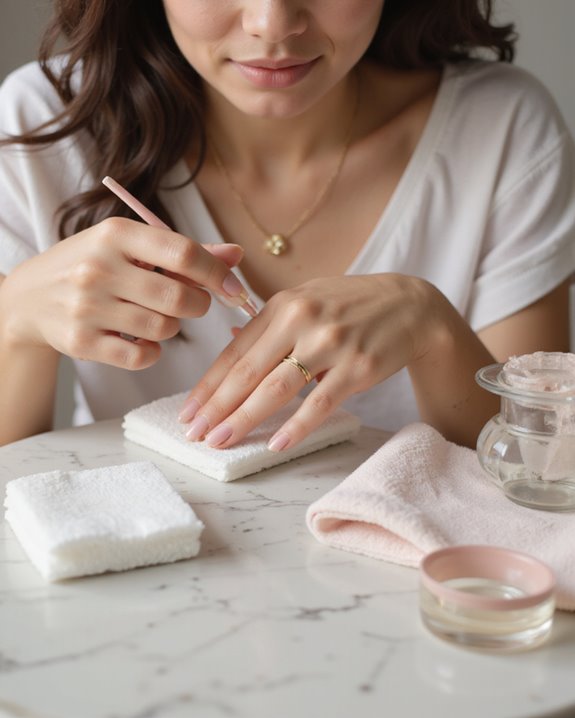
Apply Moisturizer To Repair Nail Damage

Restoring moisture to your freshly-liberated nail beds represents the most essential step in your post-acrylic recovery process. Acetone strips away natural oils, leaving your nails vulnerable to brittleness and breakage, which makes immediate hydration essential for proper healing.
Moisturizer Choices should emphasize restorative ingredients, particularly jojoba oil, which penetrates deeply to nourish damaged cuticles and nail plates. I recommend selecting fragrance-free formulations to prevent further irritation on your already-sensitive nail beds.
Establish a consistent Daily Routine by massaging your chosen moisturizer into your nails twice daily, focusing on the cuticles and surrounding skin. This practice will accelerate nail recovery, with most users experiencing noticeable improvements in strength and elasticity within seven days of consistent application.
Give Your Natural Nails Time To Recover

The proper healing process extends beyond moisturizing to include a dedicated recovery period for your natural nails. I recommend allowing at least 7-10 days of rest after acrylic removal, as this timeframe is vital for nail strengthening and proper regeneration. During this period, apply cuticle oil or moisturizer twice daily to hydrate the nail plate and surrounding tissues, enhancing flexibility and preventing brittleness.
For effective damage prevention, resist the urge to apply new polish or enhancements for a minimum of one week, allowing your nails to breathe and rebuild their protective barriers. Monitor your nails carefully for signs of thinning or peeling, consulting a professional if recovery stalls after two weeks. Incorporate gentle maintenance practices, such as single-direction filing, to support healing without introducing additional stress to the recovering nail bed.
Frequently Asked Questions
How Do You Take off Acrylic Nails at Home Asap?
I once removed acrylics in under 5 minutes! For fast techniques, I’d soak your nails in hot, soapy water first, then apply non-acetone remover. These safe practices prevent damage while getting them off asap.
What Liquids Remove Acrylic Nails?
I’ve analyzed acrylic nail removers by ingredient – acetone works fastest but has environmental impact. Non-acetone removers, cuticle oil, and soapy water are gentler alternatives I’d recommend for dissolving the adhesive effectively.
How to Remove Acrylic Nails Without a Drill?
Slow and steady wins the race! I’d soak my acrylic nails in warm, soapy water for 10 minutes, then apply cuticle oil. These natural ways loosen adhesive without drills. Safety tips: be patient, never force removal.
What Dissolves Fake Nails?
I’ve found acetone most effectively causes polymer breakdown of fake nails. It’s my go-to despite its environmental impact. Non-acetone removers, hot soapy water, and cuticle oils work too, just more gradually for me.

