To repair nail clippers, I’ll guide you through seven key steps. First, place both clipper halves on a clean surface, aligning them flush. Insert the central pin with the notched end facing away, then squeeze the handles to position it correctly. Attach the lever to the notched pin until you hear a click. Test the mechanism by opening and closing several times. Clean with alcohol, apply a drop of machine oil to the pivot point, and tighten any loose screws. Following these precise steps guarantees your clippers will function like new again.
Key Takeaways
- Place both halves of the clipper body flush against each other ensuring proper alignment before reassembly.
- Insert the central pin with the notched end first, then rotate it until the notch faces away from the clipper body.
- Squeeze the clipper handles to expose the notch and securely attach the lever until you hear a definitive click.
- Test the reassembled clipper by opening and closing it to verify smooth operation of the lever and cutting mechanism.
- Apply a drop of machine oil to the pivot point to reduce friction and extend the life of your repaired clippers.
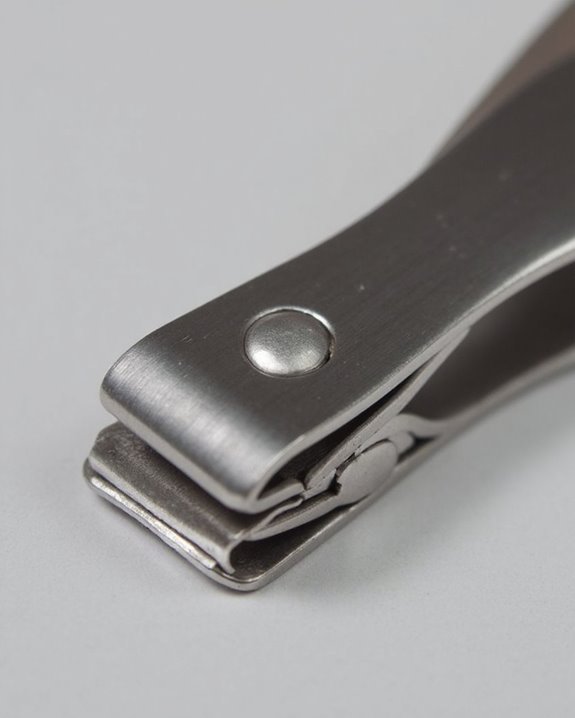
Understanding Nail Clipper Components
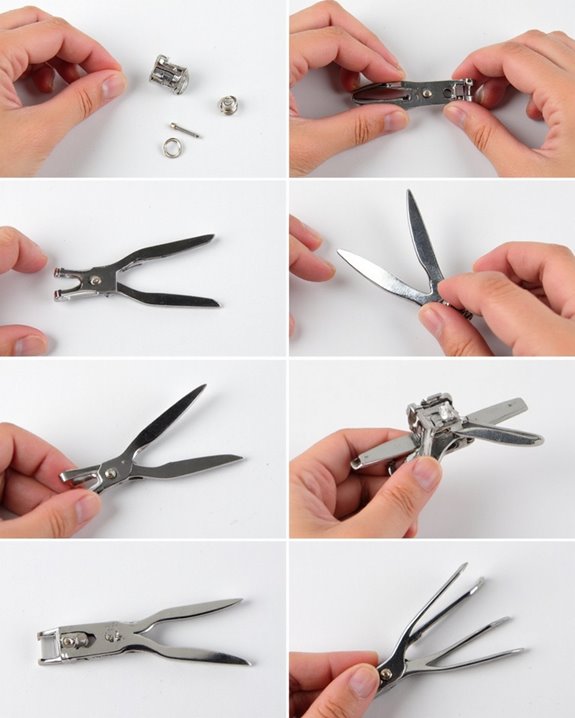
The humble nail clipper, despite its simple appearance, actually consists of several key components that work together to create an effective cutting mechanism. When repairing nail clippers, I’ve found that recognizing each part’s function makes reassembly much simpler. The central rod or pin serves as the primary connection point, which you’ll need to insert through the clipper body with the notched end first. This notch is essential as it’s where the lever (or handle) attaches, creating the pivoting action that generates cutting force. Many models include a spring mechanism between the blades for tension, requiring careful alignment during reassembly. If your nail clippers include securing screws, you’ll need a small screwdriver to properly tighten them, ensuring the components remain stable during use. Additionally, understanding the material and construction, such as stainless steel quality, can help you assess durability and ensure effective repair.
Gathering Essential Tools for Reassembly

With proper components identified, I’ll now help you prepare for the reassembly process by gathering the right tools. You’ll need a small screwdriver to tighten any loose screws when putting the clipper back together. This guarantees all components remain secure during future use.
Needle-nosed pliers or tweezers are essential for handling the tiny pin that connects the moving parts, allowing for precise alignment and careful insertion. I recommend having machine oil or specialized lubricant on hand to reduce friction between moving components after reassembly.
Create a clean, well-lit workspace where you can organize these tools systematically, making them easily accessible during the repair. Before starting, inspect each tool’s condition, as damaged or worn implements can complicate the process and potentially compromise your clipper’s functionality when assembled.
Aligning the Main Body Parts
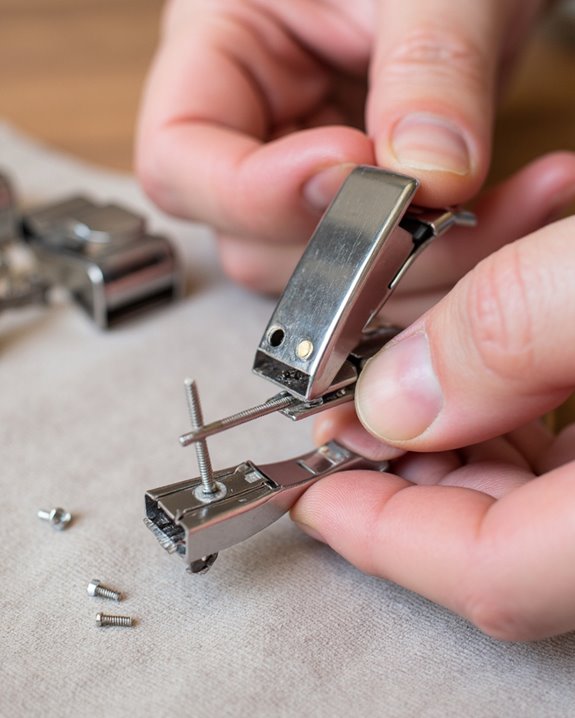
Precise alignment of your nail clipper’s body parts serves as the foundation for successful repair and future functionality. When putting broken nail clippers back together, I recommend placing both halves perfectly flush on a clean surface before proceeding with any pin insertion. This careful positioning prevents misalignment that could render your tool useless.
To guarantee proper reassembly, rotate the central rod until its notch faces away from the body, making it easier to align the lever back into place. Next, gently squeeze the handles together to help all components find their correct positions. If your nail clippers don’t close properly after reassembly, double-check the alignment of the main body components, particularly at the hinge area, as this is often where misalignment occurs and can be corrected with minor adjustments.
Positioning the Pin Correctly
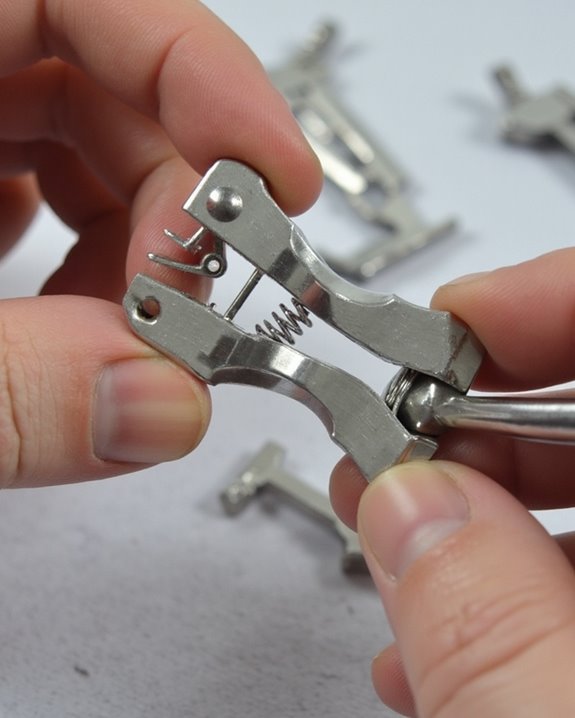
Proper placement of the pin stands as the most critical step in nail clipper restoration, determining whether your repair succeeds or fails. When you put your nail clippers back together, always insert the pin with the notched side first through the bottom hole, continuing upward through the top opening for proper alignment.
After insertion, rotate the pin until its notch faces away from the clipper body, making it easier to attach the lever. I recommend squeezing the clippers to expose the notch while holding the pin in place from underneath. This compression technique reveals the perfect position for connecting the lever’s hole to the notch.
To successfully repair your nail clippers, maintain this precise orientation throughout assembly, ensuring the handle can later thread onto the pin securely, restoring full functionality.
Securing the Lever Mechanism
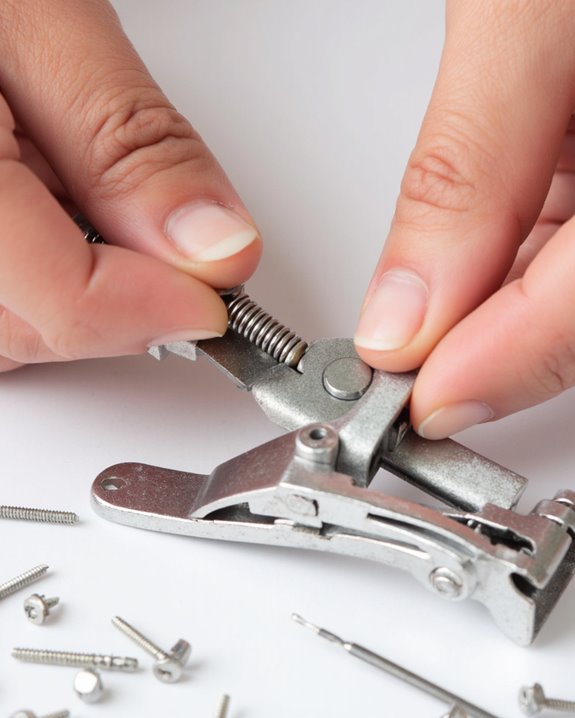
Now that you’ve positioned the pin correctly, the lever mechanism must be attached to complete the functional heart of your nail clippers. I’ll compress the clipper body to expose the rod notch, then carefully place the lever’s hole directly onto this notch. Once properly aligned, I immediately release the compression to lock everything securely in place. Proper alignment is crucial to ensure smooth operation and prevent damage to the tools. Make sure to hook the lever onto the pin’s end until you hear a definitive click, confirming proper attachment. After securing the lever, I’ll swivel it to its normal position to verify smooth operation and correct alignment. Before finishing, I always test the mechanism by opening and closing the nail clippers several times, ensuring it locks and releases properly. This testing phase helps remove debris that might have accumulated during reassembly and confirms your clippers will function reliably going forward. Additionally, inspecting the material quality of the tools can help maintain their durability over time.
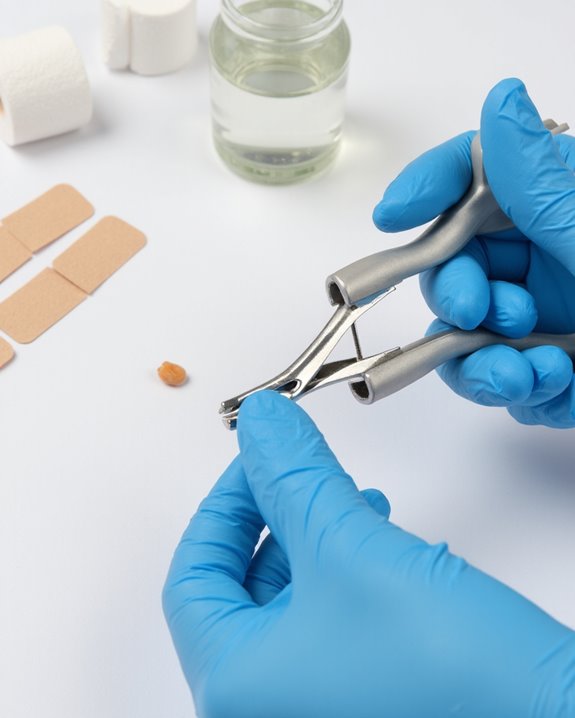
Testing Clipper Functionality
Three essential tests will confirm whether you’ve successfully restored your nail clippers to working condition. First, clip a small amount of material, like a fingernail edge or soft plastic, ensuring the blades cut smoothly without resistance, which is vital for proper nail care. Second, verify the lever action by checking that it moves freely and locks securely in position, as misalignment can prevent ideal performance.
Finally, listen carefully during operation for any unusual grinding or clicking sounds that might indicate hidden debris or incorrect assembly. If your clippers fail these tests, don’t worry—simply disassemble and try again, paying special attention to the rod and notch alignment. When properly reassembled, your nail clippers should function like new, extending their lifespan and saving you from unnecessary replacements.
Maintenance Tips for Longevity

Ensuring your nail clippers last for years isn’t difficult if you’re willing to establish a few simple maintenance habits. After each use, it’s recommended to clean your clippers with soapy water and a small brush, though rubbing alcohol works well for quick disinfection between deep cleanings. Using a disinfectant with rust prevention properties can further protect your tools from corrosion. I always apply a tiny drop of machine oil to the pivot point monthly, which keeps the cutting action smooth and prevents unnecessary strain on the components. Store your clippers in a dry place—bathroom humidity is their enemy, causing rust that weakens the metal over time. Regularly inspect for signs of damage or misalignment, and never use them on anything but nails. These simple practices save you significant time and money by extending your clippers’ lifespan, potentially turning a disposable item into a long-term tool.
Frequently Asked Questions
How Do I Put My Nail Clippers Back Together?
I’ll help you reassemble those clippers. Insert the rod through both holes, compress the body, rotate the notch, attach the lever, and release. Safety measures and tool selection prevent error fixes later!
How Are Nail Clippers Assembled?
I’ve studied nail clippers’ assembly history closely. First, I insert the rod through both holes, align the notch outward, compress the body, place the lever, then release. Design innovations and material choices have simplified this process tremendously.
How to Disassemble a Nail Cutter?
Don’t worry, it’s simple! I’d squeeze the blades together with my thumb and index finger, then flip the handle over. For disassembly safety, I always work over a clean surface and handle sharp edges carefully.
What Are the Mechanics of a Nail Clipper?
I’ll explain how nail clippers work. The lever mechanics create force multiplication when I squeeze, while the spring function returns the clipper to open position. The blade efficiency comes from precise alignment during cutting.