As an Amazon Associate, we earn from qualifying purchases. Some links on this site are affiliate links at no extra cost to you. Our recommendations are based on thorough research and editorial judgment.
5 Steps to Use Dog Nail Clippers With a Guard
To use dog nail clippers with a safety guard, first position your dog comfortably on your lap or a table. Next, inspect your clippers to verify the spoon-shaped guard is securely attached between the blades. Hold the clipper perpendicular to the nail with the guard’s wider edge facing outward. Make small, incremental cuts rather than one big snip, keeping the guard as your quick sensor. Finally, smooth any rough edges with a nail file. These steps will help protect your furry friend from painful over-cutting.
Key Takeaways
- Position the safety guard perpendicular to the nail with its wider edge facing outward to maximize protection.
- Prepare your dog and work area with styptic powder nearby in case of accidental cuts.
- Center the guard between clipper blades and verify it’s securely fastened via bolt before trimming.
- Hold clippers perpendicular to nail and make small incremental cuts rather than one big snip.
- Use the included nail file to smooth any rough edges after trimming for your dog’s comfort.
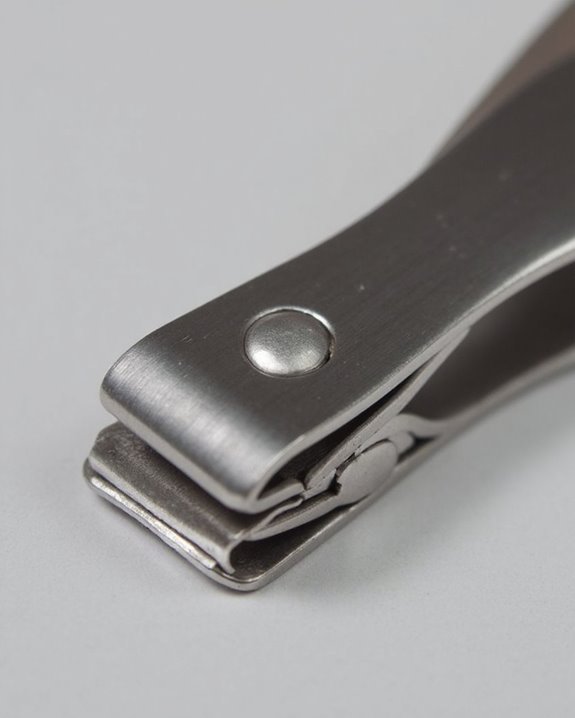
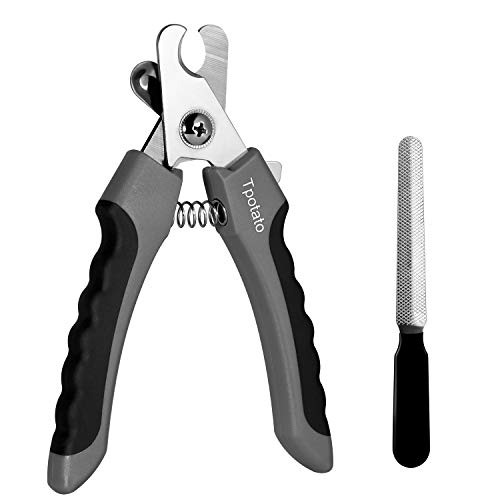
Understanding the Safety Guard on Your Nail Clippers
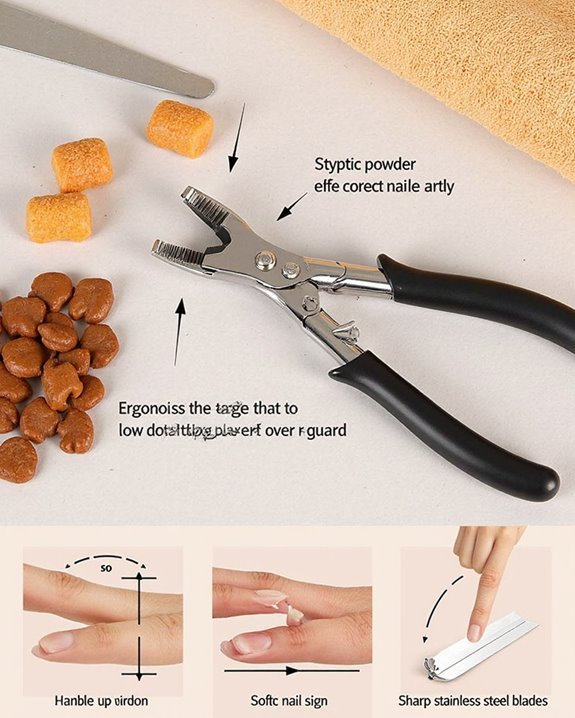
The safety guard on dog nail clippers is an essential feature that I’ve found many pet owners overlook when trimming their dog’s nails. This spoon-shaped metal bar sits between the two blades, with its wider edge facing outward and narrowing at the base where it connects via a bolt or screw. I’ve observed that it functions as a quick sensor, effectively creating a barrier to prevent accidental over-cutting. When you’re using the clippers, you’ll need to position the safety guard perpendicular to the nail for maximum protection. It’s particularly valuable for beginners, as it reduces the risk of cutting into the quick. However, I must emphasize that the guard isn’t foolproof, as nail lengths vary between dogs. For routine trims, experienced groomers might adjust the guard for better visibility while maintaining safety. Additionally, choosing a model with adjustable safety features can further enhance safety during grooming sessions.
Recommended Products

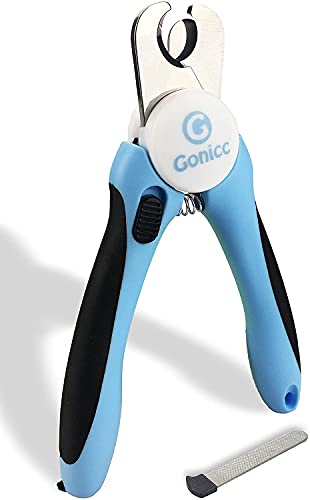
Clipping Made Easy: Experience simple, stress-free grooming with Boshel small dog nail clippers. These professional dog nail clippers feature sharp stainless-steel blades for smooth, precise cuts on pets of all sizes.

Comfortable and Easy to Use: Our pet nail clippers features ergonomic handles and a comfortable grip to make trimming your pet's nails a breeze.

2-in-1 Grooming Kit : Experience ultimate convenience by combining a heavy-duty dog nail clipper for quick trimming and a precision grinder for smoothing. Designed with a smart power lock: Simply long-press for 3 seconds to activate. This prevents accidental activation in your bag and explains why it won't start instantly—it's not defective, just safely locked
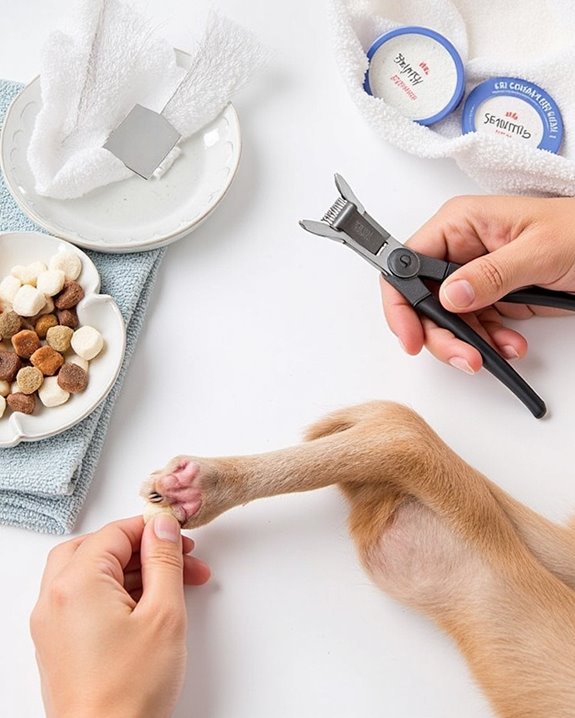
Preparing Your Dog and Equipment for Nail Trimming
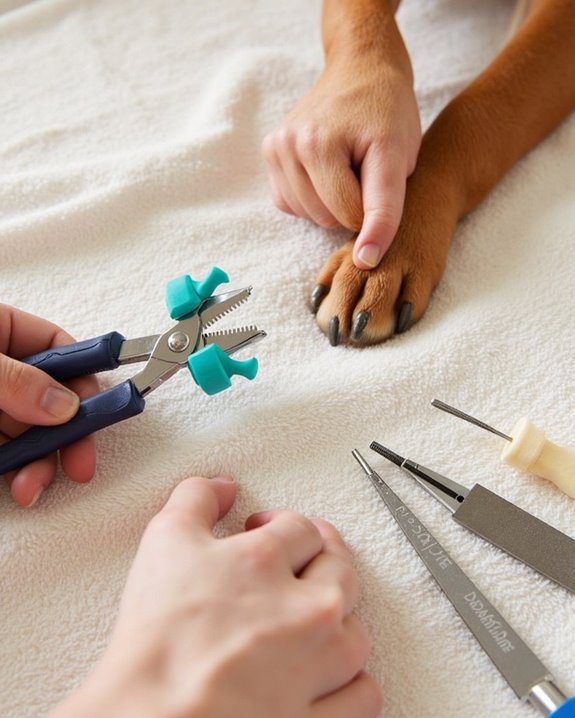
Before you begin trimming your dog’s nails, proper preparation of both your pet and equipment will greatly increase your chances of success. I recommend positioning your dog on your lap or table if they’re cooperative, using your left forearm to gently restrain their neck when trimming front claws. For wiggly dogs, laying them on their side provides better stability during the process.
Inspect your Nail Clippers thoroughly before starting, confirming the safety guard is properly attached and functional to prevent cutting too deep. I always keep styptic powder nearby in case of accidental cuts, along with the nail file that comes with the Mighty Paw clippers. These preparations guarantee you’ll have everything needed within reach, making the trimming session smoother and less stressful for both you and your dog.
Recommended Products

ADJUSTABLE SAFE GUIDE FOR ALL SIZES: The 1mm-3mm adjustable transparent safe guide accommodates pets of all breeds and nail sizes, ensuring precise trimming without cutting into sensitive bloodlines. Customize it for your pet's needs and groom with confidence

BUILT-IN LED LIGHT: Our LED light illuminates light-colored nails for a safer, easier cutting experience, perfect for families with dogs and cats. (Note: LED light may not be as effective on dark nails.)
Vet & Groomer Recommended Professional Design: Preferred by veterinarians, trainers and groomers, these clippers deliver fast, safe and precise trimming for medium and large dogs, ideal for at-home daily grooming.
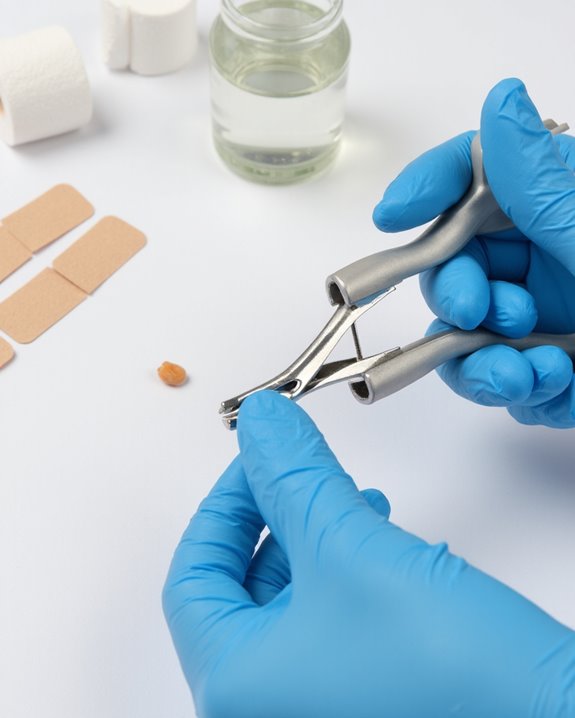
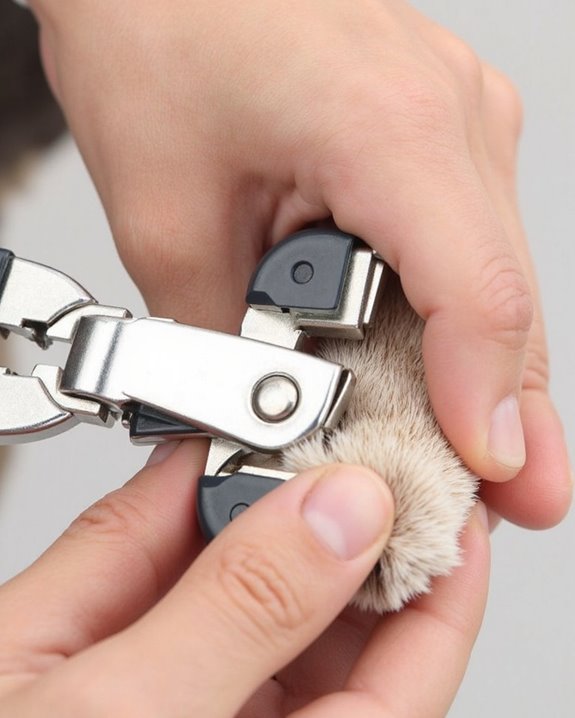
Positioning the Guard Correctly for Safe Cutting
Proper positioning of your nail clipper’s guard is critical to avoid injuring your dog’s sensitive quick, which I’ve found makes all the difference between a stress-free session and a traumatic experience. I always center the safety guard between the two blades of the nail trimmers, ensuring it creates a reliable barrier that prevents over-cutting.
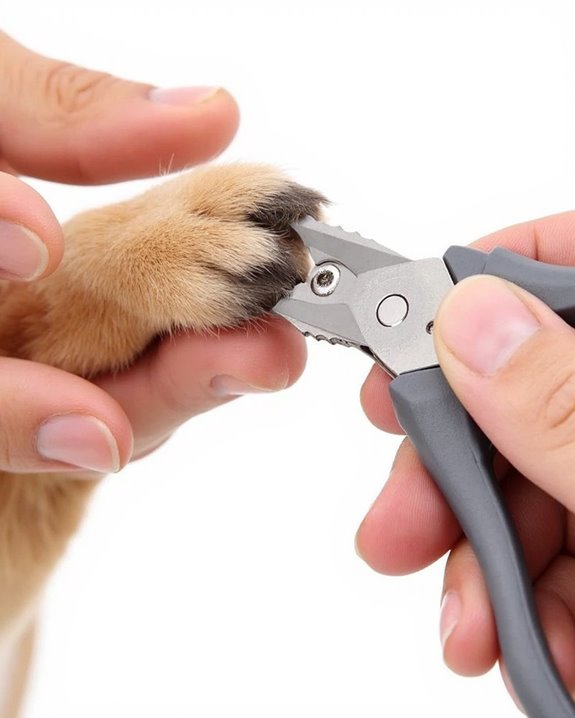
For best results, I position the spoon-shaped guard perpendicular to the nail, as this orientation provides precision while trimming. Before beginning, I verify the guard is securely fastened via its bolt, with the wider edge facing outward and the narrower base nestled between the blades. This configuration allows the guard to function as a quick sensor, automatically stopping the cut at a safe length, which is particularly valuable if you’re new to trimming your dog’s nails.
Recommended Products

Precise Pet Nail Trimming: Candure dog nail clipper is designed to help trim pet claws with better control. Suitable for routine grooming at home, this pet nail cutter helps keep nails neat and comfortable for dogs, cats, and similar pets.

Vet & Groomer Recommended Professional Design: Preferred by veterinarians, trainers and groomers, these clippers deliver fast, safe and precise trimming for medium and large dogs, ideal for at-home daily grooming.
MEDICAL STAINLESS STEEL BLADES: Say goodbye to broken, delaminated and chipped nails! The Tpotato dog nail clippers are made of high quality medical stainless steel blades with a thickness of up to 3.5mm, making them easy to cut and clean to keep you and your pet at ease. The included nail file is the icing on the cake, throwing a perfect shine on nails.2024 authoritative survey shows that 95% of veterinary clinics highly recommend this burr-free trimmer.
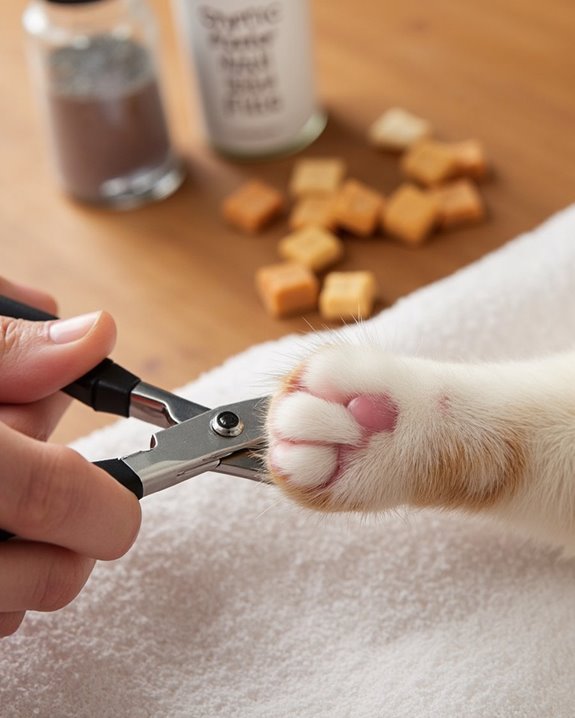
Making Clean Cuts While Using the Guard Feature
Why struggle with jagged nail edges when you can achieve professional-quality results with properly positioned guard clippers? I’ve found that placing the guard precisely between the 3.5mm stainless steel blades creates the perfect alignment to prevent over-cutting when getting your dog’s nails trimmed. Proper nail file care after trimming ensures smooth, snag-free edges and maintains your pet’s comfort. Hold the clipper perpendicular to the nail while maintaining a firm grip on the ergonomic handles, allowing controlled pressure for clean cuts without nicking the quick. I recommend making several small, incremental cuts rather than one big snip, letting the razor-sharp blades work efficiently with each squeeze. After trimming, don’t forget to use the included nail file to smooth any remaining rough edges, completing the professional finish. This technique, combined with proper guard positioning, guarantees your pet receives safe, clean trims every time.
Recommended Products

BUILT-IN LED LIGHT: Our LED light illuminates light-colored nails for a safer, easier cutting experience, perfect for families with dogs and cats. (Note: LED light may not be as effective on dark nails.)

✅【PERFECT DESIGN】OneCut Dog Nails Clippers and Pet Trimmers is Professionally Designed For Claw Cut. It's a powerful and easy to use for Pets Manicure and Pedicure. It can be used at home and Pet Lounges. Claw Cutters for Dogs comes with a Protective Guard to Protect your Pets from "Over-Cutting" and Safety Lock for easy storage

BUILT-IN LED LIGHT: Our LED light illuminates light-colored nails for a safer, easier cutting experience, perfect for families with dogs and cats. (Note: LED light may not be as effective on dark nails.)
Finishing Touches and Post-Trimming Care
Now that you’ve successfully trimmed your dog’s nails with the guard feature, it’s time to perfect those freshly cut nails with essential finishing touches. I recommend using the bonus nail file, conveniently stored in the handle of your Mighty Paw clippers, to smooth any rough edges for your dog’s comfort. If you accidentally cut the quick during trimming, immediately apply styptic powder to stop bleeding and prevent infection. After filing, inspect each nail carefully for signs of over-cutting, such as bleeding or discomfort, and monitor your dog briefly to guarantee proper recovery. Consider using a fine grit file to achieve a smooth, polished finish on your dog’s nails, reducing the risk of snags or discomfort. Don’t forget to engage the locking switch on your clippers when you’re finished, which prevents accidental injuries during storage. These post-trimming steps, while simple, are vital for maintaining your dog’s paw health and guaranteeing a positive grooming experience.
Recommended Products

Includes one 0.5 oz tub of Miracle Care Kwik Stop Styptic Powder; the Original styptic powder with Benzocaine for Pain Relief

A Must for Animal Lovers: Whether you are a pet owner, professional vet, rescue volunteer, or just a animal lover, the Evo Dyne bleed stop powder (2oz) is something you need to keep on hand for restoring & stopping bleeding for your pet’s comfort!

Fast Acting Blood Clotting – Quickly stops bleeding from minor cuts, scrapes, and nail trimming accidents in pets.
Frequently Asked Questions
How to Use a Dog Nail Clipper With a Guard?
I used to think my nerves were just decoration, but trust me, guard benefits are real! I position the guard perpendicular between blades, align it to prevent quick-cutting, and make small, controlled snips.
How to Trim Your Dog’s Nails Step by Step?
I’ll calm my dog’s trimming fears first, then secure them gently. I position the clipper perpendicular to each nail, make small cuts to avoid the quick, and file afterward for smoothness. It’s easier than expected!
How to Use Oster Dog Nail Clippers With Guard?
Did you know 60% of dogs experience nail issues? I position my Oster’s guard between blades, align centrally as a stopping mechanism, then trim perpendicular to the nail. Regular Oster maintenance keeps the guard functioning properly.
What Is the Metal Piece on Dog Nail Clippers?
The metal piece on your dog nail clippers is a safety guard. It’s typically made of stainless steel material that prevents over-cutting. I use mine as a quick sensor to protect my pup’s sensitive nail bed.